How to Sync Obsidian Across All Devices Using Git, Automatically and for Free
12 min read
If you’re looking for a seamless, automatic and totally free way to sync your Obsidian vaults across all your devices, using Git, you’re in the right place! The main benefits of this as your sync setup are the change history, freedom of choice and the fact that it remains completely free. I am currently using this exact solution across all of my devices to passively keep my notes in sync.
Here, I will be taking you through: choosing a Git provider, creating a repository, setting up sync on the devices you use and inserting some initial vault contents if you already have a vault.
Prerequisites
Understanding Git Providers and Repositories
We will need a few things before getting started:
A Git provider selected
A repository on this provider
For those that are unfamiliar, here is a quick rundown on these concepts. A Git provider is sort of the equivalent to your cloud storage provider, in this case, in that they store all your files. We will be using GitHub going forward, but you can also go with Gitlab or any other Git server provider, or even self-host your own server and keep everything completely local.
Following on from that, the repository is sort of the equivalent to a folder inside your cloud storage. Each provider has different limits for their repository sizes, but most allow a very substantial number of individual repositories.
To give you a better idea:
GitHub allows - 1GB for private repositories - Unlimited public repository size (subject to fair use and bandwidth limits)
Gitlab allows - 5GB for public & private repositories
Going forward we will be using GitHub for everything, but most instructions are relatively similar across providers, so feel free to swap things out for your ideal setup!
We will be creating a new private repository to hold the files you want to sync. While this offers a relatively secure solution, keep in mind that no system is completely immune to determined attackers.
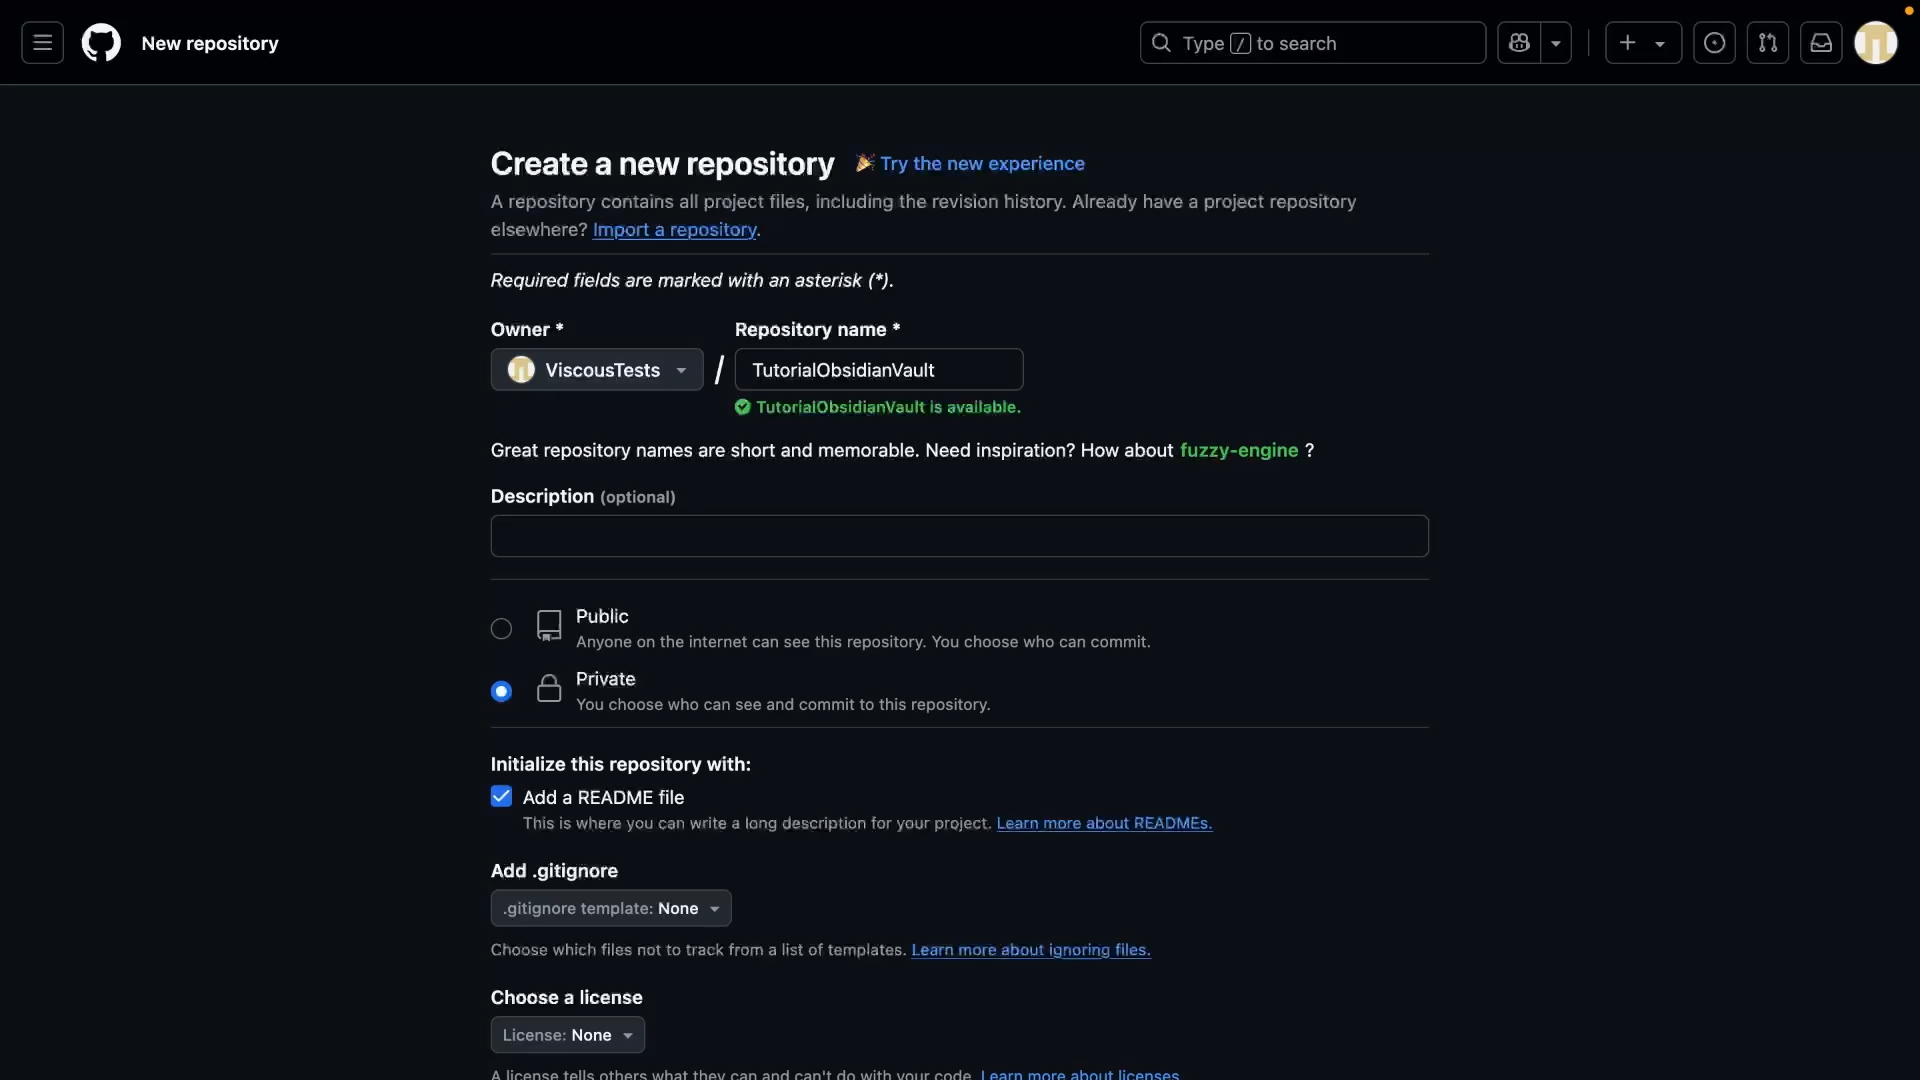
Log into your GitHub account > Click your profile icon in the top right
Select “Your repositories” from the sidebar
Click “New” to create a new repository
Enter the repository details:
Name (required)
Description (optional)
Select “Private” or “Public” based on whether you want others to have anonymous access to the contents
Enable “Initialize with README” so that your repository has some initial contents
In the next few steps you’ll need a terminal to run a few commands. It’s just for some one-time setup and should just be some copy-pasting.
Windows: Install Git for Windows, which provides Git Bash. Open it from the Start menu.
macOS: Open Terminal.app (Applications > Utilities > Terminal) or use Spotlight (Cmd + Space, then type “Terminal”).
Linux: Most distros ship with a terminal emulator preinstalled (e.g. GNOME Terminal, Konsole). Launch it from your app launcher or with Ctrl+Alt+T.
Installing Git
“Git” is the name of the program that will be doing most of the heavy lifting in tracking the change history of your vault. Before we can do anything, we first need to make sure Git is installed on our device.
Here are the commands/steps to install Git on Linux, macOS, or Windows:
With that done, at this stage, you might want to install GitHub Desktop. This is a simple tool available on all non-mobile platforms, which makes it easier to interact with Git without requiring knowledge of commands. I will be referencing it to keep this guide user friendly, but if you have more advanced knowledge, feel free to use your own commands or tools!
You can grab it for Windows and MacOS here and the Linux fork from here
There will be a tiny bit of setup after the install, so just follow the instructions and
Log in to your GitHub account through the browser
Leave the author details as default or fill them out with your username and email if it’s empty
Generate and add SSH Key for GitHub
This step is all about setting up authentication so you can interact with your GitHub account using Git, without having to enter an email or password each time.
We will need only 5 commands!
Generate an SSH Key
This command will generate a pair of keys that will be used for secure authentication. You should take every precaution to make sure the keys produced are kept private.
Windows (Git Bash) / Linux / macOS:
ssh-keygen -t ed25519 -C "your-email@example.com"
Press Enter to accept the default location (~/.ssh/id_ed25519). Set a passphrase if desired.
Start the SSH Agent
This command launches the background process (ssh-agent) that handles your private keys securely. It must be running to use SSH keys for authentication.
Windows (Git Bash) / Linux / macOS:
eval "$(ssh-agent -s)"
Add Your SSH Private Key to the Agent
Once the agent is running, this command loads your private key into it so it can be used for authentication without re-entering the passphrase each time.
Windows (Git Bash) / Linux / macOS:
ssh-add ~/.ssh/id_ed25519
Windows (Git Bash) / Linux:
Make sure to change out the path if you changed it from the default
Could not open a connection to your authentication agent
Run:
eval "$(ssh-agent -s)"
On Windows
If using PowerShell or CMD, use Git Bash instead. GitHub Desktop depends on the keys managed in Git Bash.
Test your setup using ssh -T git@github.com
Copy Your SSH Public Key
Use the appropriate command to copy the public key you generated previously into your clipboard. The public key is the one, out of the pair, that you share with your Git provider.
Windows (Git Bash):
clip < ~/.ssh/id_ed25519.pub
macOS:
pbcopy < ~/.ssh/id_ed25519.pub
Linux:
xclip -sel clip < ~/.ssh/id_ed25519.pub
Add the SSH Key to GitHub
Now let’s give GitHub that key, so we can start accessing our account through Git.
Paste the key, give it a title, and click Add SSH key
Clone the Repository with GitHub Desktop
That’s authentication officially setup for your GitHub account, so we can now move on to cloning that repository we made earlier
Open GitHub Desktop.
Go to File > Clone Repository.
Select the URL tab and enter your newly created repository url, making sure it looks like: git@github.com:username/repo.git (not https://)
This ensures GitHub Desktop can authenticate using your SSH key.
Choose a local directory for the repository (e.g., ~/Documents/my-obsidian-vault).
Click Clone.
Now if you go ahead and open up that folder in Obsidian, you should have that README file (from the checkbox we ticked during creation) and nothing else.
BONUS: Add Initial Vault Content (optional)
Hidden Folders
If you don’t see .git or .obsidian, enable hidden files/folders in your file explorer:
Windows: View > Hidden Items
macOS: Cmd + Shift + . in Finder
Linux: Ctrl + H in most file managers
If you like, you can take this opportunity to load up the folder with some initial content or copy in the files from an existing repository. Just make sure you don’t overwrite or delete the .git or .obsidian folder in there (they may be hidden by default), without meaning to.
Install Obsidian-Git Plugin
The last thing to do for our desktop setup is to make sure we have auto sync. For this, we will be using obsidian-git, which is an Obsidian Community Plugin that automates uploading and downloading the changes in your vault at given intervals, as well as intelligently, when you are done editing.
Go to Settings > Community Plugins in Obsidian.
Click Browse and search for Git.
Install and enable the Git plugin.
Configure Obsidian-Git
Go to Settings > Git.
Set the following options:
Auto commit-and-sync interval (minutes): (e.g., 5 minutes).
Auto commit-and-sync after stopping file edits: Enabled.
Commit message on auto commit-and-sync: Customize or leave as default.
Pull on startup: Enabled.
Push on commit-and-sync: Enabled.
Pull on commit-and-sync: Enabled.
Save changes.
You’re now set up to have auto sync for your Obsidian vault on desktop!
Feel free to open the Git - Source Control View and sync manually using the Commit and Sync button
While there are various Git clients available for Android and iOS, none offer a consistent experience across both platforms. GitSync was built specifically to solve this, providing a unified, purpose-built solution that’s easier to set up and maintain.
For transparency: GitSync is developed by me. It was a project built out of my own necessity, that, I am happy to say, people are finding useful for themselves.
Installing GitSync
You can find official releases of GitSync at the respective app stores:
Before setting up GitSync on iOS, we will need to do some quick setup in Obsidian
Open Obsidian
Click “Create a vault” (this will need to be new and separate from any vault’s contents you want to sync in the end)
(Skip setting up sync if prompted)
Enter a name for your vault (e.g. “Obsidian”)
Add some initial contents so we can more easily locate it later (e.g. create a “Test.md” file)
The initial GitSync onboarding aims to be a beginner-friendly setup walkthrough, so it should be very quick to get setup!
Open GitSync
Select “Let’s Go” on the welcome dialog
Accept notifications permissions
The app uses these permissions to notify you when sync operations are occurring in the background. There is also an in-app setting to toggle these off.
The app requires this permission to read/write your vault contents to keep it in sync
Android has the ability for scoped storage access, but the API for this is incomplete and slow, to the point that it cannot be used in this case.
On the “almost there” dialog, you can optionally check out the wiki, or skip on ahead
Now we will authenticate with our previously created GitHub account. At this point, you could reuse the private key from the desktop setup with GitSync too, by utilising the SSH authentication option and importing the key.
However, for simplicity and speed, I will be running through the GitHub OAuth option included in the app.
Make sure you have the GitHub authentication option selected and click the OAuth button
Authenticate in the browser with your GitHub credentials
As a final step, the app will request that you fill out the author details (username & email)
Please fill this out with your GitHub username and/or email address
The next step is to clone your existing repository from GitHub. If you have used OAuth, you can simply select the repository name from the list. If you opted for SSH authentication, then just use a valid URL, as described for the desktop setup.
When prompted to select a directory to clone into:
on Android
Create a new and empty folder (this will need to be new and separate from any vault’s contents you want to sync in the end)
Select the newly created folder to clone into (any contents may be overwritten)
on iOS
Select the folder of the previously created Obsidian vault (check for the file you created to verify)
Select overwrite when prompted to replace the existing contents
Once the clone is complete, you are almost finished with your setup.
BONUS: Add Initial Vault Content (optional)
As a bonus step, of course, you can now copy in some initial contents to your vault directory and trigger a sync in-app, using the “Sync Changes” button. You should then be able to see your changes reflected in the repository in the browswer, as well as any devices set up for sync.
The plugin obsidian-git will interfere with GitSync, so you will need to disable it on your mobile devices!
This can easily be done by opening your Obsidian vault on your mobile device, scrolling to the bottom of the Git settings and enabling Disable on this device
Configure Background Sync
on Android
You can setup auto sync, which is ideal for Obsidian
With it setup, the app will sync your vault everytime you open or close (background/foreground) a selected app; in this case Obsidian.
Simply:
Enable the accessibility service
The app uses this permission to detect when a selected app has been opened or closed
Add Obsidian to the application list
Enable “sync on app(s) opened” and/or “sync on app(s) closed”
From here, you could also optionally enable scheduled sync so periodic sync up to as often as every 15 minutes
on iOS
You can setup scheduled sync, which will sync as often as iOS allows (can be as often as 15 minutes after some time)
You should now be setup for Obsidian vault auto sync on your mobile devices!
Final Words
Hopefully this has been helpful in getting Obsidian set up for auto sync using Git! If you find anything wrong with this guide or have any issues, please do leave a comment so that it can be kept up to date.
Before you go on your way, here are a few handy links to bookmark:
Make sure to replace {username} and {repository-name} with your actual GitHub username and repository name (e.g. https://github.com/ViscousPot/GitSync):


.png)